
The Datum on a cnc machine is an origin point from where the program references its sequence of moves. There are actually several usable datums using G code such as G53, the machine datum which is generally a fixed point on the machine. G54, the user defined machining offset, or the many other datums from G54.1 up to G59.
I’m going to concentrate on G54. On the most basic kind of desktop cnc machine, when I secure a piece of material to the bed of my machine and insert the tool into the spindle collet, I need to tell the controller where the tool is in relation to the material to be machined.
Before I set up the datum on the machine, I need to decide where the datum on the program will be. In theory, it can be at any point, but realistically a datum that can be easily referenced is best, for example bottom left of the material or the centre. For the majority of my work, the datum is always at the bottom left hand corner on the top surface of the material.
There are many ways to set the datum on the machine. On a desktop machine, I use a slip gauge. I usually eyeball the X and Y positions and set them to zero. To do this, jog the tool down to about a millimeter or two above the surface of the material. Don’t forget to adjust the jog step distance right down so you don’t crash the machine.
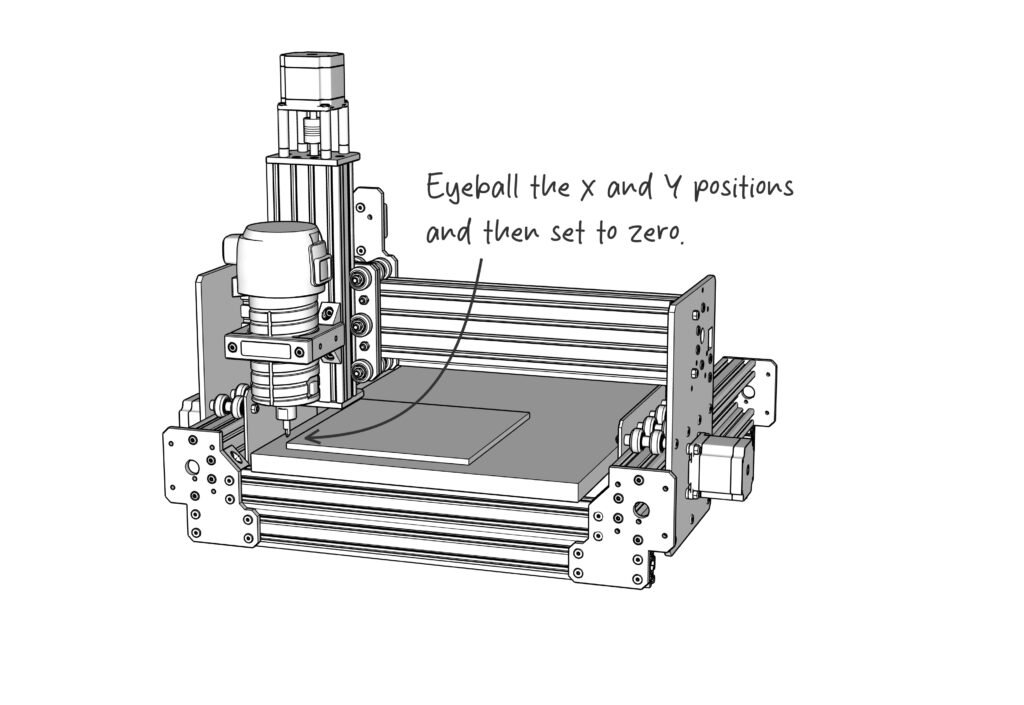
Position the centre of the tool above the bottom left hand corner of the material and zero the X and the Y axis. Next, making sure that there is clearance between the tool and the surface, jog the spindle about 50mm on the X axis and 50mm on the Y axis. The distance isn’t really important, it could be 100mm or it could be 25mm. I just need to move away from the corner.
For a slip gauge, I use a cigarette paper. Green Rizla are 1 thousandth of an inch or 25 microns thick. I put the cigarette paper between the tool tip and the material. Lower the Z axis in very small increments and check if the cigarette paper is still free to move after each jog movement.
At the point where the cigarette paper is jammed between the tool and the material, the tool is touching the surface of the material and I can set the Z axis to zero.
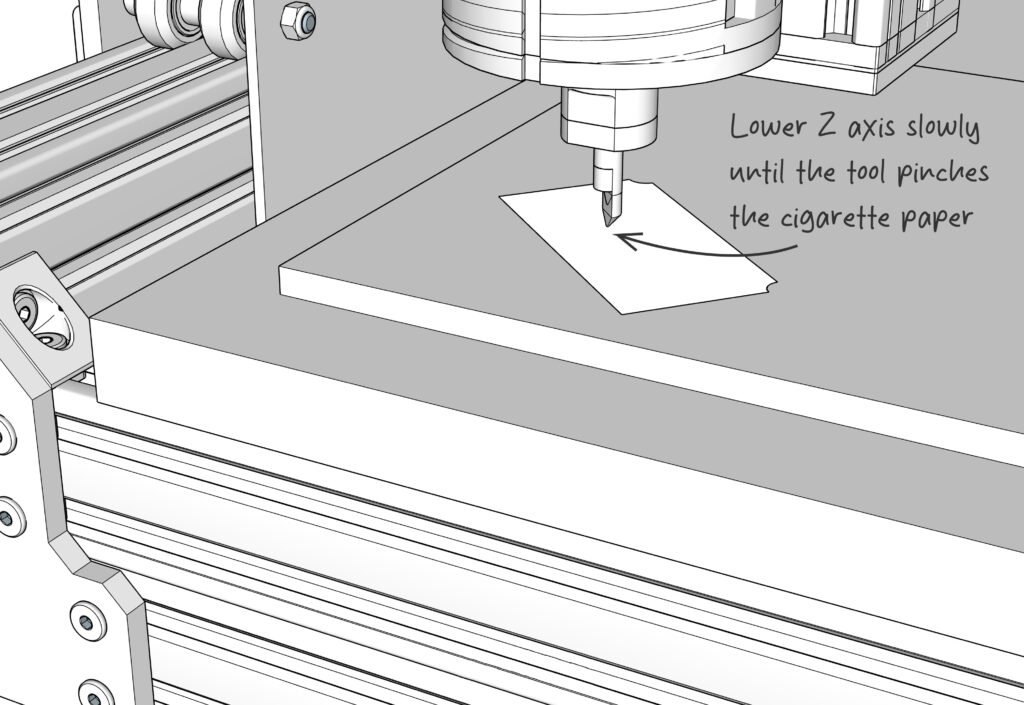
The smaller the jog movements in the Z axis are when doing this, the more accurate the Z zero will be. Some people might set the zero to 0.025mm when using this method but I don’t bother. I’m not going to get it that accurate using this method on a desktop machine.
If I need to be exactly on the corner of the material, I come away from the corner of the material, lower the tool and use a similar method of jogging until I touch the X and Y axis using the shank of the tool. I must remember to offset by half of the tool shank diameter.
That’s the most basic way to zero a simple desktop cnc machine, I hope this helped.